# Unpacking a self-defending Windows crackme
- Author: Tejashwi Kalp Taru
- Published: 2026-09-02
- Canonical: https://tejashwi.in/unpacking-a-self-defending-windows-crackme/
- Categories: Reverse Engineering, Security
- Tags: reverseengineering, crackme, unpacking, packers, windows, x64, anti-debug, ida, x64dbg, unicorn
- Summary: Every section empty on disk, a three layer packer, hash-resolved imports, and a background thread that kills the process 200 ms after you patch the branch. Part one of a crackme writeup.
I got into reverse engineering around 2009, before college, for the least respectable reason there is. Somebody on a forum posted a crackme and I wanted to know how the check worked. There was no plan behind it and nothing at stake, I just wanted to see the inside of a program that did not want to be seen.
For five or six years after that it was what I did with my spare time. Crackmes, CTF challenges, the odd talk, and a lot of arguing about unpacking on IRC at hours I should have been asleep. Then work happened, and life, and the disassembler went to the back of the queue. The interest never really went anywhere though, and these days when a free weekend turns up I go and see what modern protection is doing, mostly because it has moved a long way from the UPX-and-a-prayer era I grew up on.
This one is a keygenme wrapped in a fairly new x64 protector, the kind that does packing, compression, obfuscation, anti-debug and full virtualisation of whichever functions the author picks, in the same family as Themida or VMProtect. I am not going to name it. Writing up how an attack works is one thing, publishing a page that says "here is how to break product X" is another, and everything below is general anyway.
## The challenge
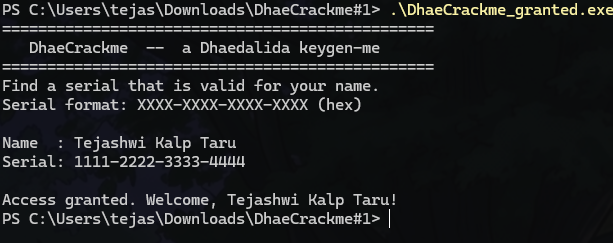
It is a 64-bit Windows console program that asks for a name and a serial in the form `XXXX-XXXX-XXXX-XXXX`, so sixteen hex digits, sixty four bits.
There are two ways to solve something like this and they are almost unrelated pieces of work. The cheap one, bronze, is to make it print "Access granted" for anything, which usually means finding the branch and killing it. The real one, gold, is a keygen: type any name, get a serial the untouched binary accepts. The validation routine here is virtualised, so there is no readable native version of it anywhere in the file, and gold means going through the virtual machine rather than around it.
If the assembly below is unfamiliar, I wrote [an introduction to reverse engineering](/introduction-to-software-reverse-engineering/) here in 2019 that walks a plain keygenme with x64dbg and IDA and ends in a twenty line keygen. Same job, without a VM, a packer and an active defence in the way.
## Identifying what I was holding
I spent some time understanding the challenge first, and the executable itself, before opening a disassembler.
The section table gives away the packing immediately:
| Section | VA | VSize | RawSize |
|---|---|---|---|
| `.text` | `0x1000` | `0x15E50` | **0** |
| `.rdata` | `0x17000` | `0xAAAC` | **0** |
| `.data`, `.pdata`, `.reloc`, VM section | ... | ... | **0** |
| packer payload | `0x49000` | `0x603735` | `0x501400` |
| packer bootstrap | `0x64D000` | `0x466` | `0x600` |
Every real section reserves address space and carries nothing on disk. The whole file is a 6 MB blob plus a small stub, and the entry point is in the stub, which only ever means a runtime unpacker. That table also sets the order of work for the rest of the project, because until the unpacking is dealt with there is nothing to reverse. Open this file in x64dbg or IDA as it ships and you are looking at zeros with a decryption stub in front of them, no code, no strings, no imports worth the name. Two other things in the headers turned out to matter much later: there is no relocation directory, so the image always lands at `0x140000000` and I could hardcode addresses for the rest of the project without thinking about ASLR again, and there is no signature and no overlay, so the file ends where the bootstrap ends and there is room to append to it.
It fights back, as expected. The usual set is in there, `IsDebuggerPresent`, the PEB `BeingDebugged` and `NtGlobalFlag` bytes, `NtQueryInformationProcess` with ProcessDebugPort and ProcessDebugObjectHandle, a check for the TitanHide device, timing. Attaching [x64dbg](https://x64dbg.com/) trips a detection path. Being detected is the smaller problem though. A virtual machine that knows it is under a debugger is free to hand you values that are simply wrong, and at that point everything you trace is fiction.
So I made a decision early and stuck to it for the whole project: **I never attached a debugger to this thing.** Every bit of the work was done either from outside the process, with `OpenProcess`, `ReadProcessMemory`, `WriteProcessMemory` and `CreateRemoteThread`, or from inside it with injected code and my own vectored exception handler. None of that looks like a debugger to the target, so none of those checks ever had anything to fire on.
Read out of a running process, the decision logic is four instructions and completely unambiguous:
```asm
0x1400011B9 call validate ; validate(name, len, serial_lo, serial_hi)
0x1400011BE test eax, eax
0x1400011C0 je denied ; 74 19
0x1400011C2 ... "Access granted. Welcome, %s!"
denied: ... "Access denied."
```
`validate` at `0x140001260` is a single `jmp` into the virtualised section, and that jump is the entire readable form of the check.
## Getting the real program out
The code only exists once the unpacker has run, so getting hold of it became its own small project. There are three layers between the file on disk and anything worth reading, and I ended up going through them twice by two different routes, which turned out to matter.
**Layer one** is the bootstrap in the small section that holds the entry point. It XOR-decrypts itself in place with an eight byte key, `0x484F4C59414C4D41`, and about 0x238 bytes of it come alive. Reproducing that offline is a loop and nothing more, once you have noticed that the entry point is decrypting the ground it is standing on.
What the decrypted stub then does is the first real obstacle. It carries no import table, so instead of asking the loader for anything it walks the PEB to find loaded modules, then hashes every exported name it sees and compares against a list of constants. The hash is a rotate-left-7 and add, seeded on the golden ratio:
```python
def api_hash(name):
h = 0x9E3779B9
for c in name.upper():
h = ((h << 7) | (h >> 25)) & 0xFFFFFFFF
h = (h + ord(c)) & 0xFFFFFFFF
return h
```
Hash the export tables of `kernel32` and `ntdll` with that and the constants stop being opaque. `VirtualAlloc`, `RtlGetCompressionWorkSpaceSize`, `RtlDecompressBufferEx`, and that last one tells you what **layer two** is before you have traced a single instruction of it. The 6 MB payload section is compressed, and it is compressed with XPRESS Huffman, which Windows will decompress for you through `RtlDecompressBufferEx` with format `0x0104`. Roughly 5 MB in, roughly 6 MB out.
**Layer three** is where it stops being convenient. The decompressed blob is the protector's own unpacker, and it is the properly obfuscated part: junk bytes wedged between real instructions, a jump after nearly every one so the flow never runs straight, and deliberate `UD2` exceptions dispatched through its own handlers as a control flow mechanism. It decrypts every original section, writes each one into place, resolves the real import table by the same hashing trick, and finally jumps to the original entry point at RVA `0x1C64`.
Reproducing that offline means running it, so I wrote an emulator on [Unicorn](https://www.unicorn-engine.org/) that came to about 1100 lines. Most of that is not emulation, it is the environment the unpacker expects to find. A TIB and a PEB it can walk, with module entries that look real. An answer for every API it resolves by hash, which means implementing enough of `VirtualAlloc` and the decompression call to keep it moving. And handling for the `UD2` control flow, because a naive emulator stops dead at the first one. Get all that right and the unpacker runs to completion inside the emulator and lays the sections down, at which point you dump them.
That dump had a flaw I did not notice for a while. Roughly 3.6% of the bytes in the virtualised section came out as scattered zeroes, artefacts of the parts of the environment I had approximated rather than implemented. Fine for reading the program. Completely useless for running the check, which returned 0 no matter what I fed it, correct serials included.
**The other route** is the one that works, and it is embarrassingly simple next to the emulator. The binary contains a correct unpacker already, so let it run. Start the process on real Windows, wait for it to reach the input prompt, which means unpacking has finished, then read the sections straight out of it from another process with `OpenProcess` and `ReadProcessMemory`. Nothing to detect there: reading another process's memory is not debugging, and the anti-debug never had anything to fire on. What comes back is byte-perfect, because it is the protector's own work rather than my approximation of it.
Diffing the two dumps was worth the hour on its own. They agreed everywhere except `.data`, which is CRT state that only exists in a live process, so the disagreement was expected and its shape confirmed the rest of both dumps were sound.
Those section dumps are the foundation everything else stands on, so it is worth spelling out what they turned into. Rebuilt into a PE, they load in x64dbg and IDA at `0x140000000`, and that image is where every disassembly screenshot in both parts comes from. Not a running process, a dead file in a static view, which is why there is no anti-debug and no decoy distortion in any of them and why the addresses still match what you get at runtime. Loaded into Unicorn instead, the same sections give you `validate` executing faithfully with no process anywhere, which is the version I could call thousands of times, hook at whatever address I wanted, and log instructions out of without anything on the other side noticing. And pulled out on its own, the virtualised section is the blob the disassembler, the devirtualiser and eventually the backward slicer all chewed on.
Which dump goes into Unicorn matters, and it is the part I got wrong first time. Everything that mattered later is Unicorn loaded with the *live* dump rather than with its own output. A virtual machine that returns 0 for every input looks identical to a virtual machine you have not understood yet, and I lost real time to that before working out it was the input that was broken.
## What the packer throws at you
Worth pulling the defences together in one place, because they arrive scattered across the work and each one changes what you are allowed to do next.
| What it does | How it shows up | What I did about it |
|---|---|---|
| Bootstrap decrypts itself | Entry point in a tiny section, everything else raw size 0 | Reproduce the XOR, or skip it and let the process do the work |
| Imports resolved by hashing names off the PEB | Import directory points into a region that is zeroed on disk | Hash the export tables yourself to recover the names. Never rebuild from a dump, stand on top of the packer instead |
| XPRESS Huffman compression | `RtlDecompressBufferEx` in the resolved API list | Call the same API, or let it run |
| Obfuscated stage three unpacker | Junk bytes, a jump after every real instruction, `UD2` as control flow | Emulate it with the exceptions handled, or let it run |
| Anti-debug suite | Detection path trips the moment x64dbg attaches | Never attach. External memory access and remote threads look like nothing |
| No relocations, fixed base | Empty relocation directory, always loads at `0x140000000` | Leaned on it. Every address in both parts is hardcoded |
| Runtime integrity watchdog | Clean exit, code 0, 200 ms after a write to `.text` | Hook its kill switch before touching anything |
| No header or section table check | Nothing reacts to an added section | Verified it by testing, then used the space |
| Console-only I/O | Piped stdin and stdout produce an empty screen and a hung process | Stop reading its output, read its memory instead |
Two of those are worth dwelling on because they cut in opposite directions.
The import hashing is the one that punishes the obvious move. Every instinct says dump the unpacked process, rebuild a PE, and work on that, and it will not run. The import table in a raw dump is either empty or full of pointers that were valid in a process that no longer exists, so the CRT dereferences garbage and dies long before it reaches anything you care about. A packer that hides its imports has also, deliberately or not, made dump-and-rebuild useless. The way past it is to stop trying to replace the packer and start treating it as infrastructure, because it resolves imports correctly every single time it runs, for free, on your behalf.
The missing relocations cut the other way entirely, and in my favour. No relocation directory means the image cannot be rebased, so it is always at `0x140000000`, so every address I have ever written down about this binary is still true on the next run. That is a convenience for the packer, which gets to use absolute addressing internally, and it is a much bigger convenience for me, because hardcoded addresses in a patch, a hook or an injected stub simply keep working.
## What static analysis actually gives you
With a rebuilt image in hand, this is finally an ordinary reversing job, and it is worth seeing how much of one.
Loading the shipping binary in either tool is a waste of time. IDA gives you one function and no strings, x64dbg drops you at the decryption stub with a screen of zeros behind it, and neither is wrong, there genuinely is nothing there. Load the rebuilt image instead, at `0x140000000` so the addresses line up with everything else, and it behaves like a normal small program. Strings are back. Imports are back. `main` decompiles into something you can read after renaming a few things and fixing the signatures.
The parser is where the useful details are. The shift-in accumulates left to right, so the first eight hex digits land in the high dword and the call passes the low half first, which is the classic way to write a keygen that never validates. I want to say I did not make that mistake, but I did, briefly. Dashes and spaces get skipped without being counted, so the dashed and undashed forms are the same input, and the digit count is checked exactly: sixteen or rejected.
Follow `validate_serial` and the road stops. As far as IDA is concerned, its target is one function:
| Metric | Value |
|---|---|
| Size | `0x1F947` bytes, 129,351 of them |
| Instructions IDA recovers | 885 |
| Basic blocks | 216 |
| Callers / callees | 0 / itself |
| Strings | 0 |
A single self-recursive blob covering most of the section, and Hex-Rays on it produces interpreter soup. There is no key check function in there to decompile, because the comparison does not exist as a comparison at all, it is smeared across a dispatch loop.
So static analysis gives you exactly two useful things and then stops. It gives you the whole outer program, which is how the input is parsed and where the result is used. And it gives you the address of the wall, `0x140001260`, along with the certainty that nothing behind it is going to yield to reading. What it also gives you, incidentally, is the patch site: `call validate`, `test eax, eax`, `je`, and two bytes at `0x1400011C0` deciding which string gets printed. That is the bronze solve sitting in plain sight, and it is the next thing I tried.
## The bronze patch, and the watchdog that kills it
`eax = 0` sends the `je` at `0x1400011C0` to denied, so overwriting `74 19` with `90 90` drops you through to granted regardless of what you typed. Textbook stuff, and where this challenge stops being polite. I did it the documented way, patching the two bytes in the live process once it had finished unpacking:
```
pre-patch bytes = 74 19
patch: VProtect=True Write=True wrote=2
t=0ms after-patch: EXITED code=0x0 <-- dead within 200 ms
```
A clean exit with code 0, which is not what a crash looks like. The main thread was parked in `ReadConsole` at the name prompt when it happened, so whatever killed the process was some other thread, and a tidy exit from a thread that had nothing else to do points at one thing: something is watching, and it called an exit API when it saw the change.
Reading memory never bothered it and writing always did, which made the rest straightforward to pin down:
| Experiment | Result |
|---|---|
| `VirtualProtectEx` to RWX, no write | alive. The page is already RWX at runtime, old protection `0x40` |
| Write `90 90`, no protection change | dead at 200 ms |
| Protect and write | dead at 200 ms |
| Hook `ExitProcess` to `ret`, then patch | dead |
| Hook `RtlExitUserProcess` to `ret`, then patch | dead |
| Hook **`TerminateProcess`** to `ret`, then patch | **survives** |
So it is watching the byte value rather than the page protection, which I liked: the section stays writable the entire time it is being guarded, and being protected is not the same as being immutable. There is a background thread hashing `.text` with about 200 ms of latency, and when it decides something has changed it calls `kernel32!TerminateProcess`. Turning that one function into a `ret` before touching anything is enough, and it is the smallest change that works, since `ExitProcess` and the rest are left alone and the program still shuts down normally when you are finished with it. The watchdog carries on detecting the tamper, it just no longer has a way to act on it. Order matters and nothing else does: hook first, patch second.
Shipping that as one file is the other half of the job. Rebuilding a PE out of the section dumps is a dead end, because the import table is resolved at runtime by the packer, so a raw dump has an IAT that is either empty or full of stale pointers and the CRT dereferences garbage long before it reaches the branch I care about. Keeping the original and making it patch itself avoids all of that. I did have to find out how much extra weight the packer would tolerate, which I tested rather than assumed:
| Added to the original | Runs and unpacks? |
|---|---|
| An extra section, bumped section count and `SizeOfImage` | yes, no header checksum |
| Plus a TLS callback that only `ret`s | yes |
| Plus a thread that sleeps forever, with extra imports | yes |
| Plus that thread writing to `.text` | no, watchdog |
It guards the content of `.text` and nothing else, not its own headers, not the section table. So the finished build is one appended section holding a hand-written `kernel32` import descriptor with the PE's import directory repointed at it, which costs nothing because the original directory pointed into a zeroed region anyway, plus a TLS directory so the loader calls me at process attach before the packer's entry point runs. The callback starts a thread that sleeps a second, writes `0xC3` over `TerminateProcess`, waits for `7419` to appear at the branch, and then writes `9090` over it. With no relocations in the image, the stub can use absolute addresses throughout.
Verifying it was slightly annoying. The program talks through `ReadConsole` and `WriteConsole`, so piping stdin and stdout at it gets you an empty screen and a process waiting patiently for a console that is not there. Rather than try to scrape it I polled the branch bytes instead: `0000` at 0 ms while it is still packed, `7419` at 600 ms once unpacked, `9090` at 1000 ms once my thread has done its work, and then it just keeps running.
That is bronze finished, in a single file with no launcher and no debugger attached. It is the lesser solve and I knew it going in, but it left me with something more useful than the trophy, which is a live process I could tamper with freely for the rest of the project.
## What part two covers
Bronze is a patch, and a patch is not an answer. The binary still knows the serial I typed was wrong, it just cannot do anything about it any more, and if the author shipped a new build tomorrow the whole thing would need doing again. The real target is the algorithm: what turns a name into an expected serial, and how to run that backwards.
All of it lives inside the virtual machine, in the 129 KB of dispatch loop that IDA gives up on. [Part two](/defeating-code-virtualization-keygen-writeup/) is that half. Reading values out of the VM without a debugger, defeating its anti-single-step trap, recovering the serial transform and the name hashes from a trace, walking into a decoy that only lies when your answer is correct, and coming out the other side with a keygen that is fifteen lines of arithmetic.
## Downloads
- keygenme-challenge.zip, the original packed challenge. Windows x64, runs fine in a VM.
- keygenme-unpacked.zip, the runtime-unpacked image rebuilt as a PE so it loads statically at `0x140000000`. Every address in this post lines up in it. It will not run, because a rebuilt image has no usable IAT.
The keygen itself is in [part two](/defeating-code-virtualization-keygen-writeup/).